 |
| At the Highest Point in Idaho! |
After a successful climb of Mt. Rainier, it was time to make
the long drive back home to Virginia. Of
course, with unclimbed U.S. state highpoints still remaining on my list, the
route home was going to be anything but direct.
After returning to Seattle and collecting all of my gear and
having surgery performed on my infected finger (see my Rainier write-up), I
opted for a short drive over to Ellensburg, Washington to check into a nice
hotel for the evening. It was helpful to
re-familiarize myself with the creature comforts of civilization, get properly
clean again, and, most importantly, have a good night’s rest. It was really nice just to sleep in, in the
morning.
The next day was a down day of driving. I made my way south into Oregon, cutting
through the Wallowa mountain range and passing into Idaho. I made a pit stop outside of Boise to do some
laundry and have dinner. It was getting
late in the day by this point, but I decided to push on to the trailhead for
Borah Peak, the highest point in Idaho, which was still another 4 hours
away.
It wasn’t until after midnight that I finally parked at the
trailhead. Other cars were there as
well, so I did my best to shut off my lights and not make any noise. Being that I was going to get up in a few
short hours, I did not bother to set up camp opting instead to catch a few
winks in my vehicle. In seemingly no
time at all, it was the break of dawn. It’s
“go time”.
I saw two other hikers from Utah getting ready to head out first. I asked them if they were taking a rope, and
they said they were not. In fact, it
looked like they were not taking much of anything treating the objective of
Borah Peak a bit more casually than I was preparing to. This helped to inform my packing
decisions. In the end, I opted to not
take a rope, but I did carry accessory cord, climbing harness, and a few
runners, and I left the crampons behind since they necessitated wearing
different (heavier) boots.
I should probably make a note that Borah Peak is unlike most
of the other state highpoints, so some care has to be taken about what to bring
and what not to bring. The standard
route is done in a single day, but that gives little insight into the difficulty
of the objective. Similarly, one might
be misled by the low elevation of 12,667 feet.
In reality, the route climbs 5100 feet in the first 3.5 miles. That is nearly a 28% grade the entire way to
the ridgeline, and I do mean the entire way.
That is just the warm-up though.
The ridgeline itself, also known as “chicken-out ridge” is long and airy. It is mostly a class 3 scramble, though there
is a section of class 4 climbing and a snow bridge with steep drop-offs. This
is the part where most people “chicken out”.
Beyond that there is more climbing to the true summit.
The problem arises mostly in the class 4 section, as it is
also considered by some climbers to actually be low class 5 which would mean
taking a rope. Since the vertical
section is short (maybe 15 feet) and climbable in both directions, I reasoned
that I could protect it with accessory cord in lieu of taking an entire
rope. I was probably pushing the edge on
what is considered safe climbing, but my fears would prove to be unfounded, at
least in this section. As for the crampons,
the only portion of the route with snow was the snow bridge, and it was not
necessary to have them with the snow being soft. Obviously conditions can vary though.
 |
| One of the Two Signs at the Trailhead |
With my final kit decided, I moseyed up to the trailhead
proper. There were pretty good signs
speaking to the history of Borah and the climbing of Borah replete with several
safety tips. After a cursory reading, I
was off.
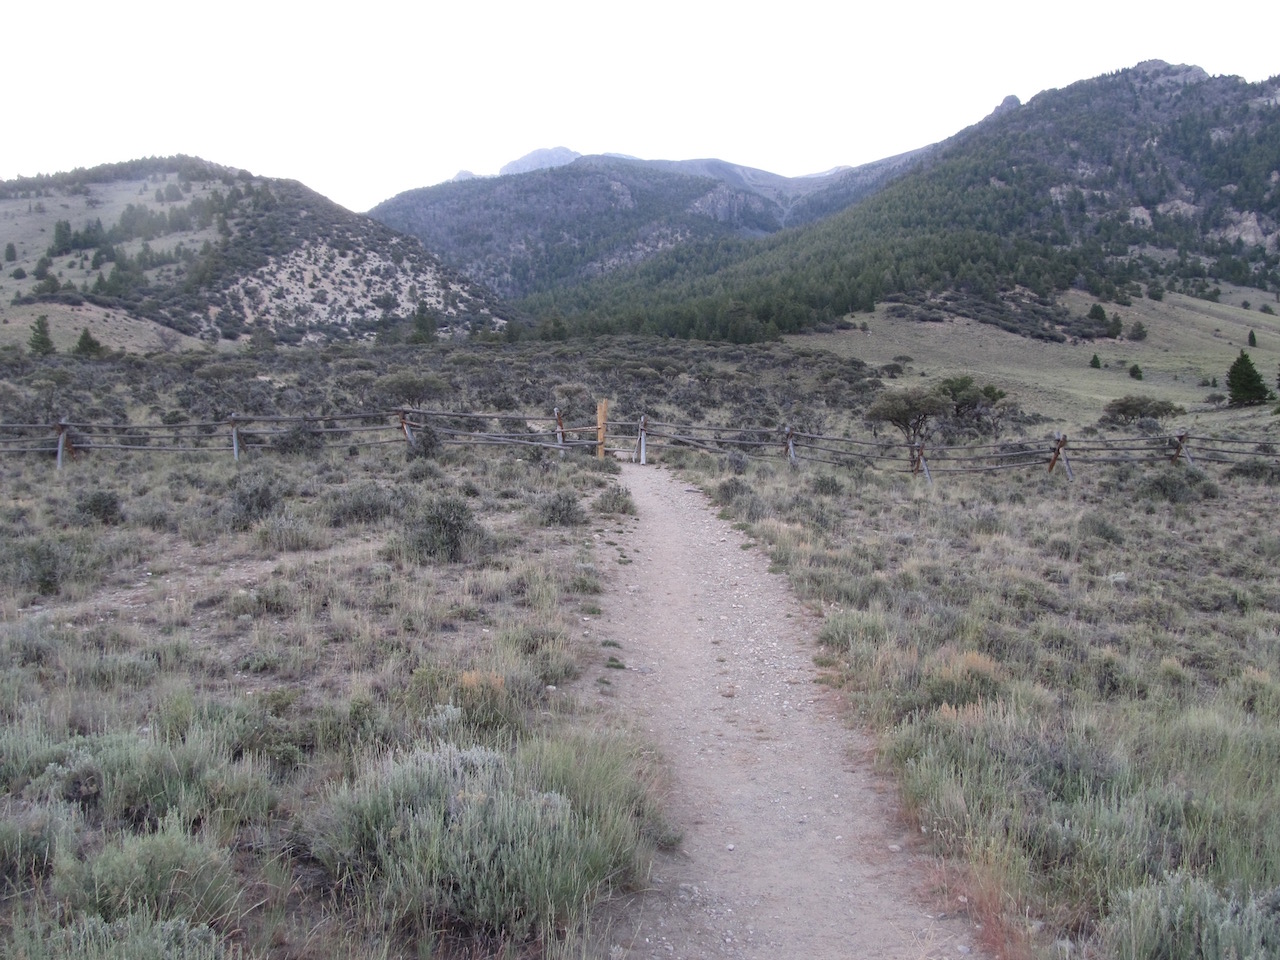 |
| The Starting Point, AKA the Only Flat Section! |
The trail quickly found itself in the upward direction and
never relented. It was strange. At a comfortable hiking pace, I noticed that
I was breathing heavier. I was certainly
well acclimated to the altitude with my previous climbs on this trip. This was more about the deceptive steepness
of the route. It did not seem that
steep, but on average it was a 28% grade.
When there were switchbacks, albeit not often, they were opportunities
to gain a lot of height all at once rather than an easing of the
difficulty. Indeed, it was a long,
steady march upward into the sky.
 |
| Typical Section on the Approach |
There
wasn’t much to see along this approach.
The trees became sparser and shorter, and the view back towards the
parking area became more distant.
It was only in the final stretch to the ridgeline that the world opened up in full view. I now had a sense of place in this mountain range and where the ultimate objective lied.
 |
| Finally Approaching the Ridgeline |
It was only in the final stretch to the ridgeline that the world opened up in full view. I now had a sense of place in this mountain range and where the ultimate objective lied.
 |
| Route Ahead: Summit to the Left, Trail to the Right, Snow Bridge in the Middle |
Yikes! I was
swallowed up in the scenery. Clearly,
the path ahead was a very long, rocky crescent that made its way out to a steep
depression, across a snowbridge, and then wrapped its way back to the highest
point in Idaho (and beyond). Of course,
there was no more “path” to follow. The
path became a faint foot trail and once in the vicinity of the ridgeline
proper, one had to infer the best way ahead.
Sometimes there would be an indication of where others had passed before
and sometimes not. A lack of other
hikers nearby meant the route finding was entirely up to me.
While scrambling along the ridge, I ended up being in for a
mix of terrain. Simply walking along the
top was rarely a viable option. So that
necessitated picking a side. The outside
looked a bit safer. So I worked my way
from one ledge up to another generally trying to traverse ahead while also
gaining elevation.
Once I reached the
middle of the crescent, it was a bit easier to make progress, with a more
up-and-down path presenting itself.
At times though, the outside traverse proved easier. The downside was that class 3 terrain was at times class 4, so one had to exercise due caution.
 |
| Snowbridge Coming Into View |
 |
| Ridgeline, Crux Getting Closer |
At times though, the outside traverse proved easier. The downside was that class 3 terrain was at times class 4, so one had to exercise due caution.
 |
| Typical Section Along the Ridgeline |
I finally made it to the point where most people “chicken out”! I looked down from the high rock to the
snowbridge and studied the way down for a moment. There was clearly a channel within which to
make my way down with seemingly plenty of holds, for both feet and hands.
It could not have been easier. I literally descended the troublesome section in less than 5 seconds. All hype! The snow was soft, and so it was an easy march across.
 |
| Looking Straight Down the Class 4 Climb to the Snowbridge |
It could not have been easier. I literally descended the troublesome section in less than 5 seconds. All hype! The snow was soft, and so it was an easy march across.
 |
| Looking Back: Gives a Good Sense of the Steepness |
On the other side of the snow bridge, I made my first
mistake. I assumed that I needed to stay
on the ridgeline with its ups and downs and occasional workarounds. I totally missed the footpath on the inside
of the crescent that bypassed most of this more difficult terrain. So I ended up with a more sporting
outing. I may not have ever realized my
error if it were not for the hikers from Utah returning from the summit
motioning towards the lower path that they were following back. Oops.
I asked them how it was to the summit, and they said it was more of the
same, “nothing harder than what you have already done”.
 |
| Still More to Climb! |
Those reassuring words proved to not be the case for
me. Indeed, I wish I had struck out with
these chaps in the morning to avoid all of the nonsense I would soon be in
for. I seemed to have an instinct to
avoid or entirely miss the easiest route.
What lied before me, for nearly the next 2 hours, was a search for a
path to the summit. I was so close, yet
so far. I began by making my way to the
ridgeline via a direct beeline. Holds
gave away to slabby terrain. At one
point I ventured into clear, low class 5 terrain. Not the way to proceed! I very carefully descended the slab, hoping
not to begin an unstoppable slide. With
no sticky rubber rand on my hiking boots, I needed to find the class 3 way out
of this mess. I traversed a bit more and
tried going high again, once more to no avail.
I descended some, traversed more over some short icy sections and made my way back up. Finally, I could gain the ridgeline proper, and from that point to the summit it was surprisingly easy! When you are going the right way, the whole thing becomes much more doable.
 |
| Gaining the Ridgeline was Actually Tricky |
I descended some, traversed more over some short icy sections and made my way back up. Finally, I could gain the ridgeline proper, and from that point to the summit it was surprisingly easy! When you are going the right way, the whole thing becomes much more doable.
 |
| Last Stretch (Finally Back on Trail) |
At the summit, there were a few strewn rocks more or less in
a pile. Amid the rocks, was a canister
containing the summit register.
Underneath some of the other rocks were various flags, and, curiously
enough, under another rock there was a rubber chicken covered in flies.
I liberated the chicken and really got a kick out of it. I guess it was there, tongue-in-cheek, for the “Chicken Out Ridge”. It was good to see a sense of humor out here. I also made an entry in the summit register, officially confirming the completion of my 46th state highpoint – yay! Only Wyoming, Montana, Alaska, and Hawaii remain. Only one of those is actually easy though.
 |
| Summit of Borah Peak Replete with Register, Flag, and Rubber Chicken |
I liberated the chicken and really got a kick out of it. I guess it was there, tongue-in-cheek, for the “Chicken Out Ridge”. It was good to see a sense of humor out here. I also made an entry in the summit register, officially confirming the completion of my 46th state highpoint – yay! Only Wyoming, Montana, Alaska, and Hawaii remain. Only one of those is actually easy though.
 |
| View From the Top: Note Lake Below |
I spent some time taking in the views. They were exceptional, and the remoteness of
the place was palpable. After tarrying
for a bit to savor the place, I tidied up the summit area and prepared my
descent.
 |
| Another View from the Top |
If it wasn’t exactly clear how to climb this last peak, it
wasn’t exactly clear how to descend it either.
I more or less kept to the last path that actually worked. After descending about half way down the
peak, I saw a party making their way towards me. Excellent!
I could extrapolate the rest of the route from me to them and from them
back to the snowbridge. When they asked
me the way up, I just indicated the path I was following down. I let them know though that I was winging it
for a lack of an obvious path to follow.
I wish someone had the idea to spray paint blazes to clear up the
confusion for the easily confused. Oh
well.
I made my way back to the snowbridge without having to climb
along the ridgeline, which was quite a bit faster and easier. I crossed the snow once more, and now I was
faced with a vertical climb. This was
definitely harder than the descent, but it was pretty quick to dispense
with. All I needed was a good foothold,
and I was good to go. Finally on top of
the ridgeline, I made my way up and down, again and again, occasionally going
around a gendarme. I saw another hiker
pass, heading towards the summit and making very good time over the tricky
rock. Nice. All was similarly good for me until I made my
way to the last part of the crescent. At
that point, my climb completely fell apart.
This was most perplexing to me. I was nearly done with all of the climbing,
and I was simply crossing over the very same terrain that I climbed over on the
ascent. Somehow, it was different. My attempts to complete the traverse and come
off of the ridge were seemingly blocked by terrain that was decidedly more
difficult than class 3. I worked my way
farther down the mountain, and at that point, my one trekking pole lost its
inner section and fell the rest of the way down the cliff face. I did not need the poles to complete the climb,
but I was not too happy about losing $150 worth of trekking poles, either. I descended even farther, until I reached a
definite ledge. It was a no-go point
that beyond was class 5 the rest of the way down to the valley below. With a real rope, I could rappel the route,
reclaim the lost pole section, and walk out and eventually regain the
trail. With accessory cord, this was not
going to happen.
I considered the poles lost, and tried to figure out how to
get out of this pocket of terrain that was giving me difficulty. Fortunately, the very adept hiker who quickly
passed me as I was returning from the summit was now returning. As he approached, I called out to him to see
if he knew the best way out. His name
was Peter. He, too, had passed this very
way on the ascent and noticed that it seemed more difficult to descend. He probed around a bit and found a passage
out. It involved pushing downward on a
large sloper in order to traverse a sketchy spot. I did not even rule this way into
consideration when I was looking on my own.
A fall there would have made for a long tumble down the cliff. Peter guided me through it, and the rest of
the way was considerably easier. We
chatted for a bit, and I thanked him for his timely assistance, and then he was
off, preferring a speedier descent.
Wow, I really need to pay more attention when routefinding! This was not good terrain to get sidetracked
in. While there were plenty of ledges,
some of the rock was pretty chossy, so it was sometimes a guess if a hold was
going to be solid or not. Oh well, I was glad to be done with the difficult portion of
the climb.
The rest of the descent was easy and fairly quick. At times, I had to hold myself back from
descending with too much momentum given the steepness of the route. With time, the parking lot came back into
view, and I eventually made my way back to my vehicle. I stowed all of my gear and was off to Idaho
Falls for the night. I had a lovely
steak dinner and checked into another comfortable hotel room.
Sadly, this was not enough to promote a full recovery. Indeed, I woke up in the morning feeling
really sick. My immune system was at a
low, likely from all of the driving and climbing over the past couple of
weeks. I spent the next few days
visiting Grand Teton National Park and Yellowstone National Park, but I never
felt any better. Rather than try for
either of the Montana or Wyoming highpoints (both, long difficult backpacking
trips), I decided to drive home and cut the trip short. It wound up taking me about a week to feel
good again, so it definitely proved to be the right call.
All in all, I had an amazing road trip -- over 7000 miles of
driving and 4 new highpoints!! And by
deferring Montana and Wyoming to next summer, I now have another great road trip
to look forward to – yay!
P.S. I visited REI
after my trip and was able to exchange what remained of my trekking poles for a
new set of poles. They replaced the
defective poles, no questions asked.
Wow!
No comments:
Post a Comment